

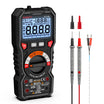
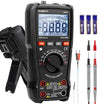

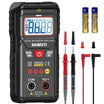
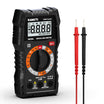
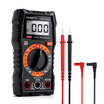
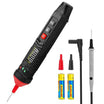
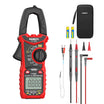
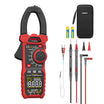
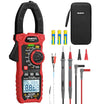
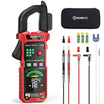
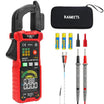
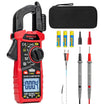
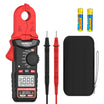
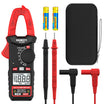




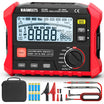
















A multimeter can help diagnose an inaccurate car temperature gauge, but it usually does this by testing the engine coolant temperature sensor and its wiring. On many modern vehicles, the dashboard gauge receives temperature data from the engine control module rather than directly from the sensor.
This guide explains how to identify the system, test it safely, and interpret the results without relying on universal resistance values that may not apply to your vehicle.

What does a car temperature gauge actually measure?
The dashboard temperature gauge indicates the temperature of the engine coolant. It helps the driver see whether the engine is warming normally or becoming too hot.
In most modern vehicles, an engine coolant temperature sensor sends information to the engine control module. The module then supplies the dashboard with the temperature reading. Older vehicles may use a separate one-wire sender connected more directly to the gauge.
Some cars use a digital display or warning light instead of a traditional needle. The diagnostic process still begins by determining whether the engine is actually overheating and whether the temperature signal is accurate.
Is the gauge faulty, or is the engine really overheating?
An unusual gauge reading does not automatically mean that the gauge or sensor has failed. A real cooling system problem can produce the same symptom.
| Gauge behavior | Possible areas to check |
|---|---|
| Stays cold after the engine warms up | Temperature sensor, connector, wiring, thermostat, or instrument cluster |
| Moves to hot soon after a cold start | Shorted sensor, damaged wiring, or an incorrect temperature signal |
| Moves up and down unexpectedly | Loose connection, low coolant, or air trapped in the cooling system |
| Reads hot with steam or coolant loss | Actual overheating that requires immediate attention |
Before electrical testing, check the coolant level only when the engine is cold. Look for visible leaks around the reservoir and hoses. If the engine is steaming or losing coolant, treat the condition as real overheating rather than continuing with a gauge test.
What do you need to test the temperature system?
You need a digital multimeter and the correct service information for your vehicle. Make sure you know how to use a multimeter safely before testing. The service manual should show the sensor location, terminal layout, and resistance specifications.
- A digital multimeter with resistance and DC voltage modes
- The vehicle’s wiring diagram or service manual
- Back-probe pins if a live voltage test is required
- Basic hand tools for accessing the connector
An OBD-II scan tool is also helpful on modern vehicles. It allows you to compare the coolant temperature reported by the engine control module with the dashboard reading.
Work around a cold engine whenever possible. Keep your hands and test leads away from belts and cooling fans. An electric fan may continue running or restart after the engine has been switched off.
How do you test a car temperature gauge with a multimeter?
You test the system by checking the coolant temperature sensor first, followed by its power supply and wiring if necessary. Do not measure resistance on an energized circuit.
1. Let the engine cool and switch off the ignition
Park on a level surface and allow the engine to cool fully. Remove the key or switch the vehicle completely off. Do not open the coolant reservoir or radiator cap while the cooling system is hot or pressurized.
2. Identify the sensor and circuit type
Use the service manual to locate the engine coolant temperature sensor. It is commonly installed near a coolant passage in the cylinder head, thermostat housing, or engine block.
A two-wire sensor usually sends information to the engine control module. A one-wire sender may use its threaded body as the electrical ground. Do not assume the terminal arrangement from appearance alone.
3. Inspect the connector and wiring
Disconnect the electrical connector and check for corrosion, bent terminals, or coolant contamination. Inspect the nearby wiring for cracked insulation or previous repairs.
A poor connector can interrupt the signal even when the sensor itself is working correctly. Repair visible damage before judging the sensor by its resistance.
4. Measure the sensor resistance while cold
Set the multimeter to resistance mode, identified by the Ω symbol. Knowing basic multimeter symbols helps prevent selecting the wrong setting. On a two-wire sensor, place one probe on each sensor terminal.
Record the resistance and the approximate coolant temperature. Compare the reading with the temperature-to-resistance chart in the vehicle’s service information.
An “OL” reading can indicate an open sensor, but it may also result from poor probe contact or an unsuitable meter range. A very low reading may indicate a short. Neither result should be used to condemn the sensor until it has been compared with the manufacturer’s specification.
5. Check how resistance changes with temperature
Most coolant temperature sensors use a negative temperature coefficient thermistor. Its resistance decreases as the sensor becomes warmer.
Reconnect the sensor and allow the engine to warm while observing normal safety precautions. Switch off the engine before disconnecting the connector and taking another resistance measurement. Compare the warmer reading with the service chart.
The resistance should change smoothly and remain within specification. A reading that does not change, drops out, or jumps unpredictably may indicate an internal sensor fault.
6. Check the sensor circuit if resistance is correct
Set the multimeter to DC voltage and follow the wiring diagram for the vehicle. With the sensor connector unplugged, some two-wire systems provide a reference voltage from the engine control module. Many use a value near 5 V, but the correct specification must be confirmed for the vehicle.
Check the reference circuit and sensor ground as directed by the service manual. Do not bridge connector terminals or allow a probe to short a reference wire to ground.
7. Test wiring continuity only with the circuit powered off
If the supply and ground are missing, inspect the harness between the sensor and control module. Disconnect the relevant components before using resistance or continuity mode.
Check for an open wire and an unwanted short to ground. Follow the manufacturer’s procedure before disconnecting the battery or testing wiring connected to an electronic control module.
8. Reconnect the system and verify the result
Secure the connector and restore any components removed for access. Start the engine and watch the gauge as the engine warms.
If the sensor value reported by a scan tool is reasonable but the dashboard reading is wrong, the problem may be in the instrument cluster or the communication circuit. A multimeter alone may not be enough to confirm that type of fault.

What do the multimeter readings mean?
The reading is useful only when it is compared with the correct specification at a known temperature. There is no single resistance range that applies to every coolant temperature sensor.
| Test result | What it may indicate |
|---|---|
| Resistance matches the service chart | The sensor is responding normally at that temperature |
| Resistance changes smoothly as temperature rises | The sensor is likely reacting to temperature changes |
| OL at different temperatures | An open sensor or poor contact with the test probes |
| Very low resistance that does not change | A shorted sensor, if the result is outside specification |
| Reading jumps when the connector is moved | A loose terminal or intermittent internal connection |
| Sensor passes but the gauge remains incorrect | A wiring, control module, communication, or cluster issue |
Replacing the sensor based on one resistance reading can lead to a misdiagnosis. Check it at more than one temperature and confirm the wiring before installing a new part.
What other problems can cause an incorrect temperature reading?
Several cooling system faults can make the gauge behave abnormally even when the temperature sensor is electrically sound.
Low coolant or trapped air
Low coolant can prevent the sensor from remaining fully surrounded by liquid. The reading may fluctuate or fail to represent the hottest part of the engine.
Repeated coolant loss usually indicates a leak. Topping up the reservoir without finding the cause may only provide a temporary improvement.
Thermostat or coolant circulation problems
A thermostat that is stuck open can make the engine warm slowly and keep the gauge low. A thermostat that does not open can contribute to overheating.
A damaged water pump or restricted radiator can also cause the engine to run hot. These are mechanical cooling problems rather than gauge faults.
Damaged wiring or connector terminals
A damaged connector can create an open or intermittent signal. Corrosion may also add resistance and distort the temperature reading.
Pay close attention to wiring near hot engine parts. Heat and vibration can damage insulation or loosen terminals over time.
What should you do if the temperature gauge enters the red zone?
Pull over safely and switch off the engine if the gauge reaches the red zone or an overheating warning appears. Continuing to drive may cause serious engine damage.
Do not remove the radiator or coolant reservoir cap while the system is hot. Steam and pressurized coolant can escape forcefully. Wait until the engine has cooled before inspecting the coolant level, and follow the instructions in the owner’s manual.
If you see steam, a major leak, or an empty coolant reservoir, arrange roadside assistance. Do not restart the engine simply because the gauge has moved back down.
If the coolant level is correct but the temperature rises again after restarting, stop driving and have the vehicle inspected. A faulty sensor is possible, but an actual circulation or cooling problem must be ruled out first.
How can you prevent temperature gauge problems?
Maintaining the cooling system reduces the chance of both inaccurate readings and real overheating.
- Check the coolant level when the engine is cold.
- Use the coolant type specified by the vehicle manufacturer.
- Repair leaks rather than repeatedly topping up the reservoir.
- Inspect sensor connectors during routine engine service.
- Investigate unusual gauge movement or warning lights promptly.
Coolant replacement intervals and bleeding procedures vary by vehicle. Follow the maintenance schedule in the owner’s manual instead of using a universal service interval.
Frequently Asked Questions
These answers cover the most common questions about testing a car temperature gauge and coolant sensor.
Can a multimeter test the dashboard temperature gauge directly?
A multimeter cannot directly confirm every type of dashboard gauge. It can test the coolant temperature sensor and basic wiring. Diagnosing a modern instrument cluster may also require a scan tool and manufacturer-specific test procedures.
What resistance should a coolant temperature sensor have?
The correct resistance depends on the sensor design and its temperature. Use the temperature-to-resistance table for the exact vehicle. A fixed range taken from another model can produce an incorrect diagnosis.
Can I test the sensor without removing it?
Yes. The sensor can usually be resistance-tested in place after its electrical connector has been unplugged. This avoids opening the cooling system and losing coolant.
Should I disconnect the car battery before testing?
Basic sensor resistance testing normally requires the ignition to be off and the sensor connector to be unplugged. Battery disconnection is not automatically required. Follow the service manual when testing harness continuity or disconnecting control modules.
Does an OL reading always mean the sensor is bad?
No. OL means the meter is detecting an open circuit or a value beyond its selected range. Check the meter setting and probe contact before replacing the sensor.
Why does the gauge stay cold when the engine feels hot?
The sensor circuit may be open, or the dashboard may not be receiving the temperature signal. A low coolant level can also affect the reading. Compare the scan-tool coolant temperature with the actual engine condition before deciding which part has failed.
Conclusion
A multimeter is most useful for testing the coolant temperature sensor and its wiring rather than the dashboard gauge alone. Measure the sensor with the circuit powered off, observe how the resistance changes, and compare every result with the manufacturer’s specifications.
If the sensor passes but the gauge remains inaccurate, further diagnosis may be needed at the wiring, control module, or instrument cluster. Stop testing and seek professional assistance whenever the engine is genuinely overheating or the correct circuit information is unavailable.

1 commento
Julius musvaire
Very helpful information
Commenta
Nota che i commenti devono essere approvati prima di essere pubblicati.
Questo sito è protetto da hCaptcha e applica le Norme sulla privacy e i Termini di servizio di hCaptcha.