










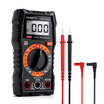








































































Testing a motherboard with a multimeter can help rule out a weak CMOS battery, an out-of-spec power supply, or an obvious power-rail fault. It cannot confirm every motherboard failure. Start with the safest checks, then stop if the diagnosis points to component-level board repair. Review how to use a multimeter before measuring any computer hardware.
What Should You Check Before Testing a Motherboard?
Before using a multimeter, inspect the board and eliminate simple setup problems. A loose power lead, damaged connector, failed fan, or depleted CMOS battery can mimic a motherboard fault.
Disconnect the AC power cable before touching components or using resistance or continuity mode. Use ESD protection when handling an unpowered board, and never open the PSU: its internal capacitors can retain hazardous voltage. The ESD Association recommends proper grounding when handling ESD-sensitive electronics.
Inspect the Board for Visible Damage
Look for liquid residue, corrosion, scorching, or damaged traces before connecting a meter. Also check the CPU socket area and expansion slots for bent contacts or foreign material.
Check Power Connections and Cooling
Confirm that the 24-pin ATX connector and CPU power connector are fully seated. Verify that the CPU cooler is mounted correctly and that its fan is connected to the appropriate motherboard header.
Use BIOS or hardware-monitoring software to investigate repeated overheating warnings. Do not rely on touching a powered motherboard to find hot spots.
Inspect Capacitors Carefully
Leaking, bulging, or visibly damaged capacitors are strong evidence that the board needs repair or replacement. A normal-looking capacitor can still fail, so a visual inspection is only a first check.
How Do You Test a Motherboard With a Multimeter?
Use a digital multimeter to check the CMOS battery and power supply first, then use resistance readings only as a screening test for a suspected short. Disconnect power before every resistance, continuity, or capacitor measurement.
Step 1: Test the CMOS Battery
A CMOS battery test can identify a simple cause of lost BIOS settings or a clock that repeatedly resets. Most desktop motherboards use a CR2032 lithium coin cell with a nominal voltage of 3 V.
Turn off the computer, unplug it, and remove the battery if the motherboard manual permits. Set the multimeter to DC voltage. Touch the red probe to the battery's positive face and the black probe to its negative side.
A new CR2032 normally measures close to 3 V. If the reading is noticeably below its nominal voltage and the computer loses its date or BIOS settings, replace the battery with the correct type. Replacing the battery may reset BIOS settings, so record any custom configuration first.
Step 2: Check the PSU Outputs Before Blaming the Motherboard
Checking ATX power rails can show whether the PSU is supplying the voltages the motherboard needs. A reading outside specification points to the PSU, its cable, or its load; it does not prove that the motherboard is faulty.
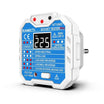
For the safest result, test with a dedicated PSU tester or have an experienced technician measure the connector with the system operating. Never probe the PSU-side sockets of a modular cable, and never use a paperclip test unless the PSU manufacturer documents the procedure.
For a standard ATX PSU, the main rails are specified within these ranges:
- +12 V: 11.40 V to 12.60 V
- +5 V: 4.75 V to 5.25 V
- +3.3 V: 3.14 V to 3.47 V
These limits reflect the ATX voltage-regulation ranges in Intel's desktop power supply design guide. A multimeter measures average voltage only, so it cannot identify ripple, brief voltage drops, or other transient faults.
Step 3: Check a Suspected Short With Power Removed
A resistance check can help identify a possible short only when the motherboard is completely unpowered. Remove the AC cable, disconnect the PSU from the board, and allow stored charge to dissipate before testing.
Set the meter to resistance or continuity mode. Place one probe on a known ground point, such as the metal shell of a USB port. Touch the other probe to the power input or area you are investigating.
A beep or a very low resistance reading is not conclusive proof of a short. Modern motherboards can show low resistance on some rails because of voltage-regulator circuitry and capacitors. Treat the result as one clue alongside symptoms such as immediate shutdown, visible damage, or a known-good PSU triggering protection.
Do not inject voltage into a motherboard or remove surface-mounted components unless you have the correct equipment and board-level repair experience. Locating a failed MOSFET or shorted rail often requires a schematic, thermal tools, and micro-soldering skills.

Step 4: Test Capacitors Only With the Right Method
A standard multimeter can sometimes flag a completely shorted capacitor, but it cannot reliably confirm that an in-circuit motherboard capacitor is healthy. Nearby components affect the reading.
If your meter has a capacitance function, accurate measurement generally requires isolating at least one capacitor lead from the circuit. ESR testing is often more useful for diagnosing aging electrolytic capacitors, but it also requires suitable equipment and interpretation.
Replace a capacitor only when you can verify its value, polarity, voltage rating, and low-ESR requirement. Otherwise, use a qualified board-repair service.
When Should You Stop and Seek Professional Motherboard Repair?
Seek professional repair when the board shows charring, corrosion, a damaged socket, or evidence of a short on a critical rail. These faults can require board schematics and precision soldering that a multimeter alone cannot provide.
Before replacing the motherboard, test with a known-good PSU and reduce the system to its essential components. A failed RAM module, graphics card, storage device, or front-panel connection can also prevent a computer from starting.
Frequently Asked Questions:
Can a multimeter confirm that a motherboard is working?
No. A multimeter can verify selected voltages, battery condition, and basic resistance readings, but it cannot test firmware, data signals, chipset faults, or intermittent stability problems.
What is the typical lifespan of a motherboard?
There is no fixed lifespan for a consumer motherboard. A well-cooled board protected from moisture and power surges can run for many years, while heat damage, liquid exposure, or unstable power can shorten its service life.
Is it possible to repair a motherboard?
Yes, but the repair depends on the fault. Replacing a CMOS battery or correcting a loose connection is straightforward. Damage to a multi-layer PCB, CPU socket, or power-delivery circuit usually requires specialist board-level repair.

Final Maintenance Tips for Motherboard Longevity
Keep the case clean, maintain clear airflow, and use a quality surge-protected power source. Periodically check that fans operate normally and that cables remain firmly connected.
If the system still fails after basic PSU, battery, and connection checks, avoid repeated power-on attempts when you suspect a short or burning component. A professional diagnosis can prevent further damage to the motherboard and connected hardware.



Leave a comment
All comments are moderated before being published.
This site is protected by hCaptcha and the hCaptcha Privacy Policy and Terms of Service apply.